Changing a tire can be a daunting task, especially with the risks involved. Tires are an essential part of any vehicle, and removing a wheel not only puts your own safety at risk, but can also endanger others around you. While many of the steps in this process are straightforward, it’s crucial to follow proper safety procedures. Key points to remember include cleaning the wheel hub of rust and debris, tightening lug nuts in a star pattern, and torquing them to the vehicle’s specifications.
1. Find a Safe Location
Start by finding a safe, flat area free from hazards or obstructions. Make sure there is ample space to work around your vehicle without interference.
2. Secure the Vehicle
Place wheel chocks on the tires that will remain on the ground to prevent the vehicle from rolling during the process.
3. Jack Up the Vehicle
Locate the jacking points on your vehicle, usually indicated by notches located behind the front tires and in front of the rear tires. Most vehicles have four designated jacking points. Use a hydraulic jack to lift the vehicle at these points.
4. Support with Jack Stands
Once the vehicle is raised, carefully place jack stands underneath for added safety. The jack itself can lose pressure or shift, which could cause damage to the vehicle and, more importantly, pose a risk to you. After positioning the stands, lower the jack slowly, allowing the vehicle to rest securely on the stands.
5. Loosen and Remove the Lug Nuts
Using a lug wrench, loosen the lug nuts (but don’t remove them entirely) while the vehicle is still on the ground. This ensures you have better leverage. Once loosened, remove the lug nuts and keep them in a safe location for reuse. Inspect them for any damage, such as worn threads or cracks.
6. Remove the Wheel
Once the lug nuts are removed, carefully take the wheel off the wheel hub. Place the wheel in a secure position to avoid it rolling or falling.
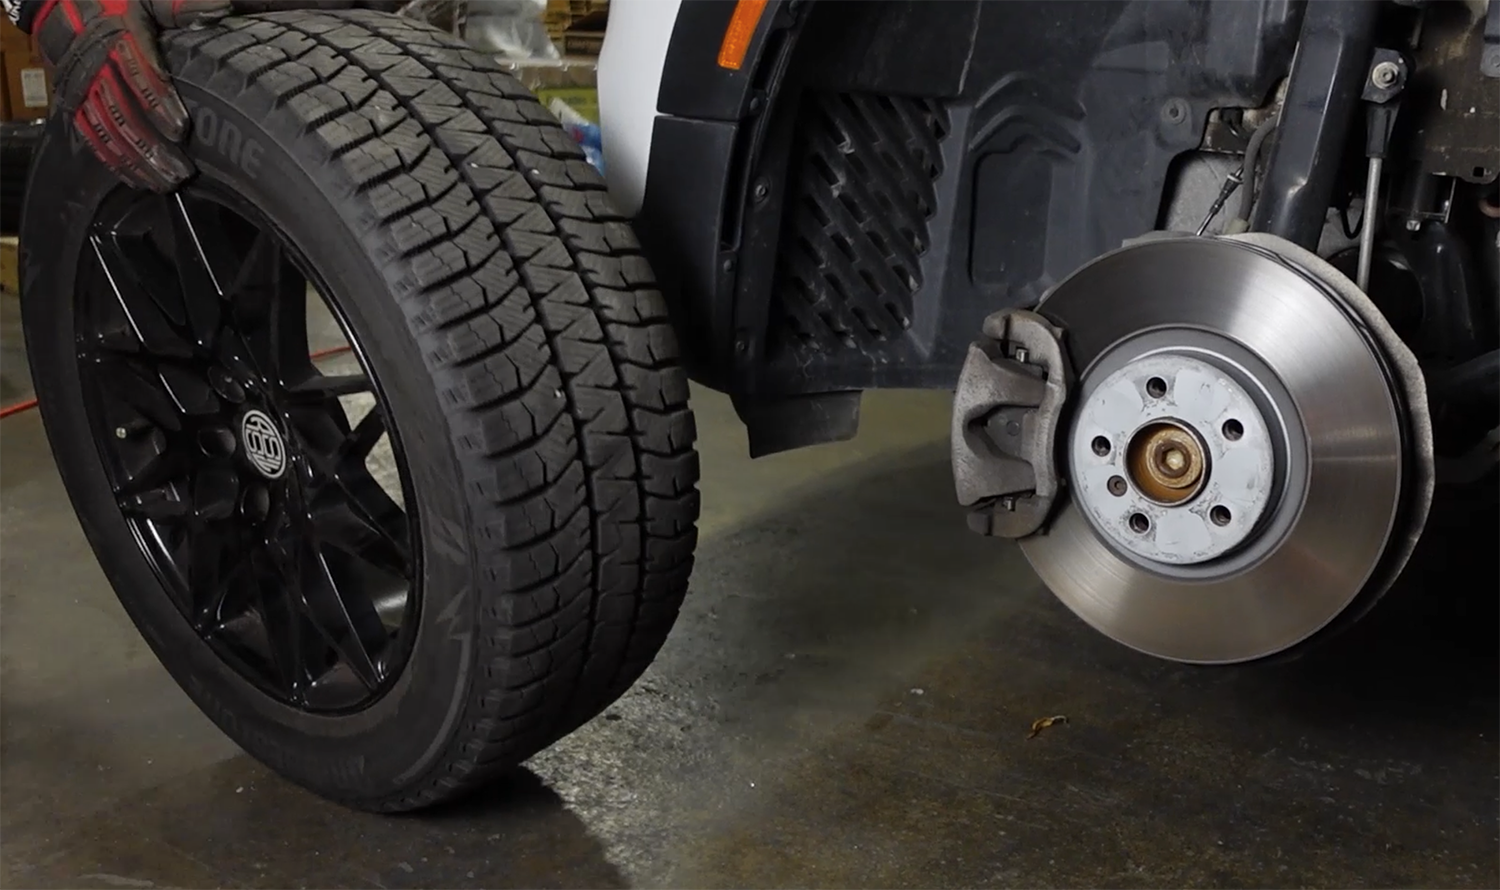
7. Inspect the Wheel Hub
Inspect the wheel hub mating surface for rust, debris, or dirt. These materials can interfere with the clamping force, which can lead to vibrations or a potential wheel detachment. Clean these surfaces thoroughly, including the hub face, threads, and the back of the wheel.
8. Replace the Tire
After cleaning the wheel, carefully remove the tire, watching for internal TPMS sensors. Replace the valve if there’s no TPMS, or inspect the sensor and valve for damage if there is. Use proper tire mounting lubricant, like tire paste, to prevent bead damage and ensure smooth installation.
9. Position the Wheel
Now, carefully position the wheel, with the new tire fitted onto the wheel hub. If you don’t have a wheel-lifting tool, you can sit on the ground and use your feet to help position the tire more easily.
10. Hand Tighten the Lug Nuts
With the wheel in position, insert the lug nuts onto the wheel studs. Hand tighten the nuts in a star pattern, making sure to tighten them in the correct order (e.g., 12 o’clock, 5 o’clock, 10 o’clock, 2 o’clock, etc.) to ensure even pressure across the wheel.
11. Tighten the Lug Nuts
Using a wrench or impact gun, tighten the lug nuts to secure the wheel. However, don’t fully tighten them at this stage.
12. Lower the Vehicle
Remove the jack stands and slowly lower the vehicle back to the ground. Before completely lowering the vehicle, make sure the tire pressure is optimal. Check the manufacturer’s recommended tire pressure and adjust if necessary.
13. Torque the Lug Nuts
Once the vehicle is fully lowered, use a torque wrench to tighten the lug nuts to the manufacturer’s specified torque value. Always use a star pattern to tighten the lug nuts. Over-tightening can stretch the studs, while under-tightening may cause the lug nuts to come loose. For safety, ensure you’re using the correct tool, such as a torque bar or torque gun.
14. Repeat for Remaining Tires
If you’re replacing multiple tires, repeat these steps for each wheel, ensuring that each is securely mounted and torqued.
Changing a wheel and tire isn’t as difficult as it may seem, but safety is key throughout the process. Always ensure your vehicle is secure, that you’re working in a safe location, and that you’re following the correct procedure for tightening lug nuts. Taking the time to clean the wheel hub and checking the torque specifications can save you from headaches and potential issues down the road.